Observatory Construction
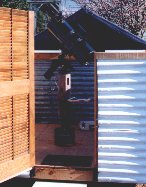
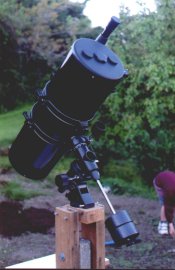
The need to construct a small observatory came about from the desire to take longer exposures of the sky. While my telescope came with a reasonably sturdy tripod I found it difficult to reposition accurately for astrophotography each time I set up. I decided to create a permanent base for the upper part of the tripod and I made this by using an old concrete fence post and fixing a wooden platform on the top positioned to point to the south.
This was a great improvement as it saved time setting up the tripod but I still needed to remove the telescope and the upper part of the tripod to take inside when I finished as there was no protection from the elements.
Early attempts at long duration photos proved a little frustrating as I really needed to leave to telescope mount permanently fixed so I could make small adjustments to the polar alignment until it was correct.
In order to take long duration photographs of the sky it's very important to have the telescope correctly aligned to the celestial pole. Observers in the Northern Hemisphere are fortunate to have the bright star Polaris as guide, in the south however there are no bright stars near the South Celestial Pole (SCP). In order to locate the SCP you need to firstly locate the constellation Octans then star hop your way to the nearest point to the pole. Before trying this with the telescope I found it easier to do this with binoculars for several nights until I could locate a group of stars near the pole. As an aid to finding the pole my telescope came equipped with a small polar alignment finder mounted inside the tripod. This has a pattern of the stars around the pole printed in the finder so you can line up the telescope using the finder. An alternative method is the "drift method" this uses the drift of stars in the eyepiece to determine the accuracy of the alignment.
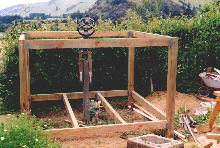
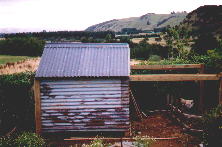
I decided that a small roll off roof observatory would be the easiest and cheapest to construct. First I had to decide where to build. I eventually settled on an area close to the house for several reasons. Firstly I live at the base of a hill which is a part of the Tauraua Ranges effectively blocking the sky west and north-west but allowing good views east and south. Building the observatory further away on the property only allowed slightly better views west and meant it would be exposed to high winds that we occasionally get. Secondly building further from the house would mean a long walk through wet grass during the winter and long grass in the summer and too far to supply electricity to the site. Next came the design.
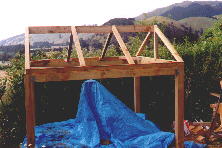
It seems no two observatories are built the same, I checked out several at the following web site: http://www.seds.org/billa/obs/obslist.html Some are quite simple others were a major construction effort. I eventually settled on a 2 metre square floor size with a peaked roof rather than a flat roof because I wanted the walls as low as possible for maximum viewing. I sketched out a plan to estimate the amount of wood I would need and decided to build it around the existing post that I had already constructed.
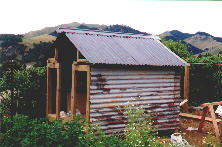
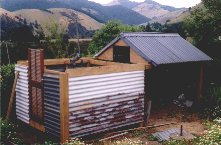
The cost of the building materials was about NZ$600. This was for the wood, concrete, wheels, hinges, nails etc. but excluded the roofing iron used on the roof and walls, which I had already, while the door and floorboards were given to me. It took my wife and myself about 3 weekends to complete the basic structure with the roof rolling off.
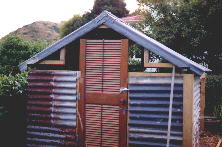
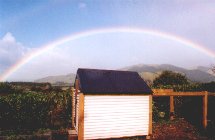
There were no major problems during the construction apart from the fact that I can't seem to cut wood straight or measure the same thing twice without getting two different results. Thankfully Jennifer prevented any major mishaps in our construction efforts. The observatory has been in operation for several weeks now and has successfully weathered strong winds and heavy rain (it's not been a great summer!), without any leaks or damage. The wheels that allow the roof to roll back require some adjustment but the design works well. Because the wall and roof are made of roofing iron it tends to get quite hot inside but once the roof is rolled back in the evening it cools down quickly. Currently I don't leave the telescope tube inside the observatory because of the heat, it's not heavy and I put it out about an hour before observing. Having a permanent observing platform saves the hassle of setting up tripods etc and means you can spend more time observing and less time setting up and packing away, an important consideration on those cold winter nights. The observatory has already returned it's first real observations, on the night of February 12 at 10 PM while fine-tuning the polar alignment I noticed the southern horizon had a bright glow. About 5 minutes later we received a call from Richard Hall to say there was an Aurora under way. The rest of the family came out and we viewed the display for about 15 minutes before it faded. I took some pictures that you can see else where on this site.
So my advice for anyone who's been thinking about building a small observatory is to give it a go! It certainly makes any astrophotography easier and it makes an interesting addition to any garden.